Tuesday 1 June 2010

Adventures in Dichroic.....

Well, I've just looked and Ive not written a blog entry since January so I thought i'd best put it right.

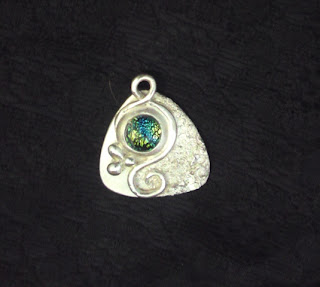
Not so long back, I treated myself to some dichroic glass cabochons as I had decided I was at the stage of working with silver clay where I felt I was confident enough to try and incorporate them into my work as I think dichroic glass is so beautiful. My first few attempts were a bit of a disaster, because for some reason, when fired, the colour on the backs of the cabochons leaked out leaving clear glass where there should have been colour. I was really disappointed as the pieces were some of the best i'd made so far in my journey of "Shinyness Making". After lots of figuring out where i'd gone wrong and a few more attempts to get it right,(some ok, some disasters),I tried again with success this time.

Here are some of the more successful pieces I ended up with, starting in numerical order from first to last. I'm hoping you think I've improved as I've gone along......

1.
2.
3.
4.
5.

Friday 29 January 2010

My Latest Shiny things

Ive made 2 new pendants today and im pleased with how they came out as ive been having a few problems firing glass in my kiln...lots of explosions and glass shatterings....not good.


The first pendant below is made using a mold of a button then ive set it with a 3mm pale amythest CZ to give a bit of interest to the piece, and added a bail to hang it from.


My second pendant is Art Deco inspired. Im really getting into Art Deco for my inspiration at the moment...the net has given me so many ideas and I didnt realise quite how beautifull everything from that era was untill now. I also think I have overcome my problem of glass exploding in my kiln as you will notice by the still intact Dichroic Glass Cabochon in the piece.

Tuesday 19 January 2010

Shiny Things

After a busy day at Shiny HQ Vicky and I had lots of nice things drying ready to fire. Both of us made rings which I managed to fire late last night and polish up today.


On the left is the ring Vicky made using a button as her inspiration.It's her first attempt at a ring and if I do say so myself her best piece so far. To add interest to the ring,some of the detail was picked out and burnished to a high shine as was the ring band(not seen in the picture) the rest was left as a brushed finish to make a good contrast. We are really pleased with how it came out and I really wish I could keep it myself.


On the right is the ring I made. Again I used a button for my inspiration but I added a Peridot CZ as embellishment for the top of the ring. this ring also has a plain silver band and has been burnished and polished to a high shine.

Sunday 17 January 2010

My First Attempt At Using Dichroic Glass With Silver Clay


Today I tried for the first time to combine a dichroic glass cabachon with a piece of silver clay jewellery. I have never been shown how to use dichroic glass before and after reading some instructions in a jewellery magazine explaining how, I decided to give it a go. I was really nervous about the firing times using my kiln as there have been times when the temperature has not been quite right and my pieces haven't fired properly. I am also not sure if my kiln is working correctly as I've followed things to the letter before and ended up with silver on the outside of my piece and clay on the inside....not good. Anyway I followed the instructions for temperatures etc and waited nervously (and a bit excitedly too) for the result. I was so scared opening that kiln door I can tell you but phew what a relief it came out in one piece and fired correctly. I am over the moon with the result I hope you are too, just take a look at the picture to see the finished piece in all its shiny glory. I'm looking forward to making more pieces with dichroic glass now, as its such a pretty glass, the possibilities are endless.

Friday 8 January 2010

All Things Shiny

Well since Natalia introduced me to the wonders of silver clay Ive been totally hooked on it and have since been to another course where I learned how to set stones in the clay and also how to make molds from silicone so you can make the same jewellery piece in the clay over and over again


The 2 pieces on the left were made by cutting the desired shape from pieces of silver clay,a disc and a heart shape.I textured the whole of the disc with a tree bark texture mat and textured half the heart with a water droplet effect texture mat,leaving the other half smooth so it could be polished to a high shine after firing. I then chose 2 stones,green for the disc and yellow for the heart and pushed them into individual rounds of clay before setting these rounds on the appropriate piece. I added a bit of interest by using a rolled piece of clay and letting it fall in a rounded zig zag shape on the pieces right through the centre of each stone.I then fired the pieces and polished them to the desired effect.For my first attempt I am pleased with the results and I hope you like them too.


The 2 pieces on the right were made from pushing silver clay into molds made from silicone,letting them enough to remove from the mold without damamging the piece and pushing small stones into the clay to decorate.I made a bail for the african head the same way as I did for the above pieces and fired them in the kiln.Both pieces were left as a brushed finish and again I am pleased with the results

Wednesday 9 December 2009

My First Piece of Silver Clay Jewellery


Well here it is the first piece of jewellery I made using Silver Clay.Made under the expert tutelage of Natalia Colman, it's a simple teardrop shape textured with a bark design texture mat and also has a small heart shape cut out to add a bit of interest.I made my own simple bail from a piece of clay and fired it all in the kiln to finish. I left it brushed as opposed to mirror finish as I thought it brought out the texture of my piece well.For the photo I added a simple length of pinky/purple suede thong but it would look just as well hung from a chain.For my first attempt I was very pleased with the result.